User Guide
I hope that the app is mostly self-explanatory, but below I have provided some helpful step-by-step guides for the various features of the app.
Create a Freezer
- From the app drawer, select the "Freezers" item to open the list of freezers.
- Tap the add button - the "+" button in the lower right corner of the screen - to open the editor.
-
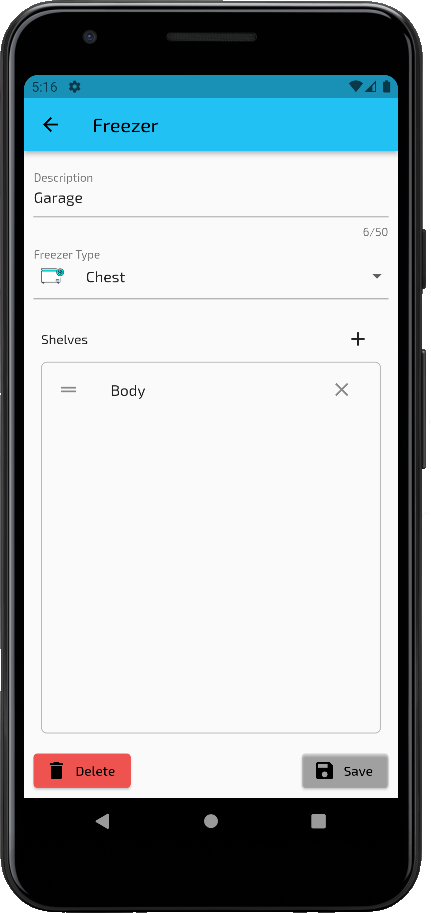
Fill in the freezer information (screen shown).
Description. A description of the freezer to be used as a label.
Type. The type of freezer (upright, chest, or drawer).
Shelves. An ordered list of shelves to help locate items in a freezer. These will appear in the freezer item editor as location options. Their ordering may be changed by long-pressing on one and dragging it up or down in the list.
- When you are done, tap the "Save" button to save the data and return to the Freezer list screen.
Edit a Freezer
- From the app drawer, select the "Freezers" item to open the list of freezers.
- Tap the desired freezer to open it in the editor.
-
Update the freezer information (screen shown).
Description. A description of the freezer to be used as a label.
Type. The type of freezer (upright, chest, or drawer).
Shelves. An ordered list of shelves to help locate items in a freezer. These will appear in the freezer item editor as location options. Their ordering may be changed by long-pressing on one and dragging it up or down in the list.
- When you are done, tap the "Save" button to save the data and return to the Freezer list screen.
Note: You can delete a freezer, by tapping the "Delete" button while on this screen.
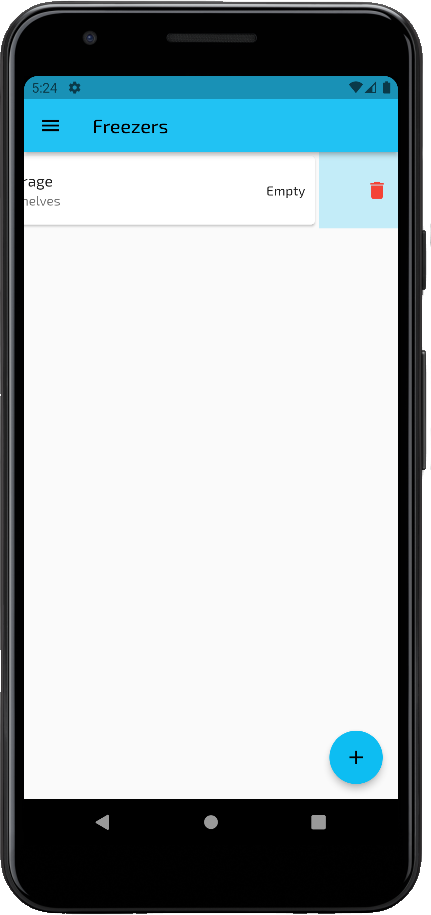
Delete a Freezer
- From the app drawer, select the "Freezers" item to open the list of freezers.
- Slide the desired freezer to the left.
- Tap "Yes" in the confirmation dialog to delete the item, or "No" to keep it.
Note: You cannot delete a freezer if it has items associated with it. You will need to remove the items or move them to another freezer before removing the freezer itself.

Create a Freezer Item
- In the app drawer, select the "Freezer Items" option to display the list of items in your freezers
- To add an item, tap the floating plus button on the bottom right of the screen. The freezer item adding screen will be opened (screen shown).
-
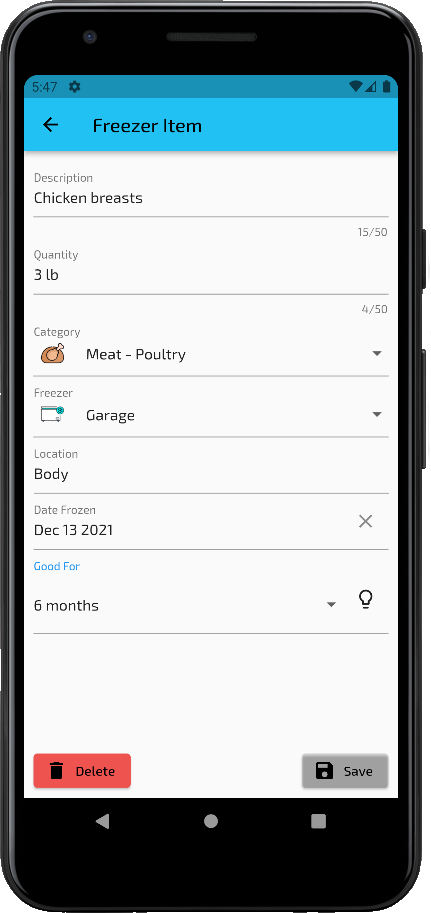
On this screen, you can describe the item being frozen with the following fields:
Description. The description of the item being frozen - should be short and descriptive.
Quantity. The amount of the item being frozen - a count, weight, etc.
Category. A general categorization of the item.
Freezer. The freezer where this item is stored (one of the freezers from your list).
Shelf. The location of the item in the freezer. The "shelves" you configured in your freezer are available.
Date Frozen. The date when you put the item in the freezer. It will automatically be set to today.
Good For. How long the item is good for in the freezer, before it needs to be consumed or disposed of.
- When you are done filling in the information for the freezer item, tap the "Save" button to add it to your freezer and return to the list of items, where your item will now be in the list.
Note: The light bulb icon next to the "Good For" selector will display a list of suggested values based on the type of food being stored.
Edit a Freezer Item
- In the app drawer, select the "Freezer Items" option to display the list of items in your freezers
- Tap the desired item to open it in the editor screen (shown).
-
On this screen, you can describe the item being frozen with the following fields:
Description. The description of the item being frozen - should be short and descriptive.
Quantity. The amount of the item being frozen - a count, weight, etc.
Category. A general categorization of the item.
Freezer. The freezer where this item is stored (one of the freezers from your list).
Shelf. The location of the item in the freezer. The "shelves" you configured in your freezer are available.
Date Frozen. The date when you put the item in the freezer. It will automatically be set to today.
Good For. How long the item is good for in the freezer, before it needs to be consumed or disposed of.
- When you are done filling in the information for the freezer item, tap the "Save" button to add it to your freezer and return to the list of items, where your item will now be in the list.
Note: The light bulb icon next to the "Good For" selector will display a list of suggested values based on the type of food being stored.
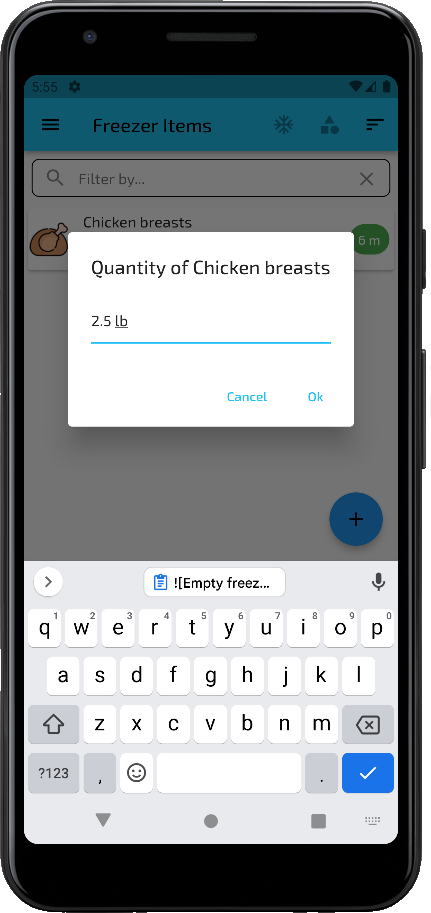
Change the Quantity of a Freezer Item
- In the app drawer, select the "Freezer Items" option to display the list of items in your freezers
- Long-press the desired item to open the quantity change dialog (shown).
- Enter the new quantity information and tap "Ok" to save the changes and return to the list.
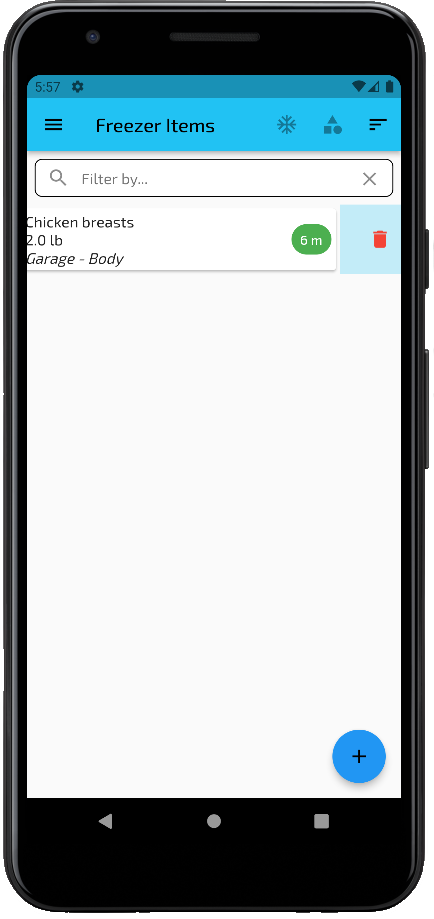
Delete a Freezer Item
- In the app drawer, select the "Freezer Items" option to display the list of items in your freezers
- To delete an item from the list, slide the desired item to the left (shown).
- A confirmation message will be displayed. If you select "Yes", the item will be deleted from your list of items.
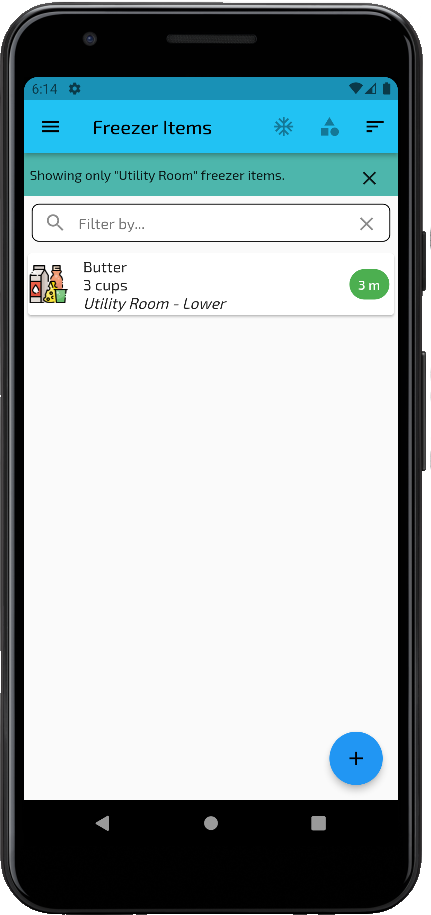
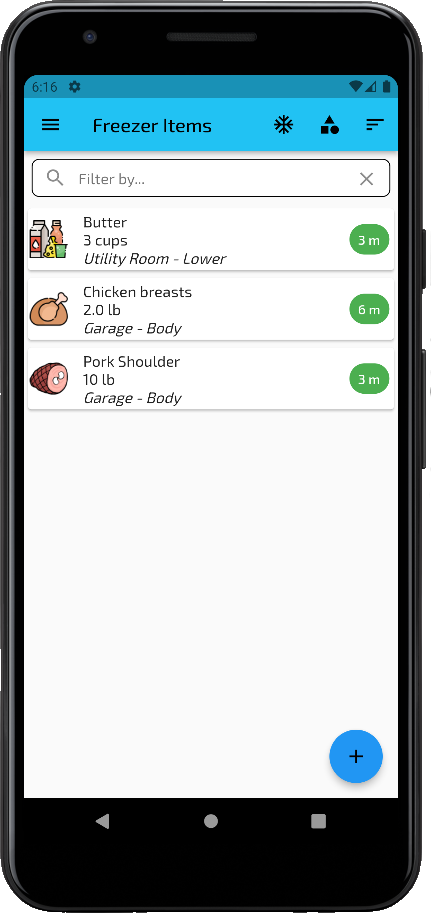
Filtering Items By Freezer
- In the app drawer, select the "Freezer Items" option to display the list of items in your freezers.
- Tap the freezer filter icon (snowflake) in the app header to open a list of your freezers.
- Select a freezer from the list to show only the items in your list that are in the specified freezer (shown).
- You can clear the filter by tapping the "X" in the filter banner.
Note: You can use the text search and category filter while filtering by freezer.
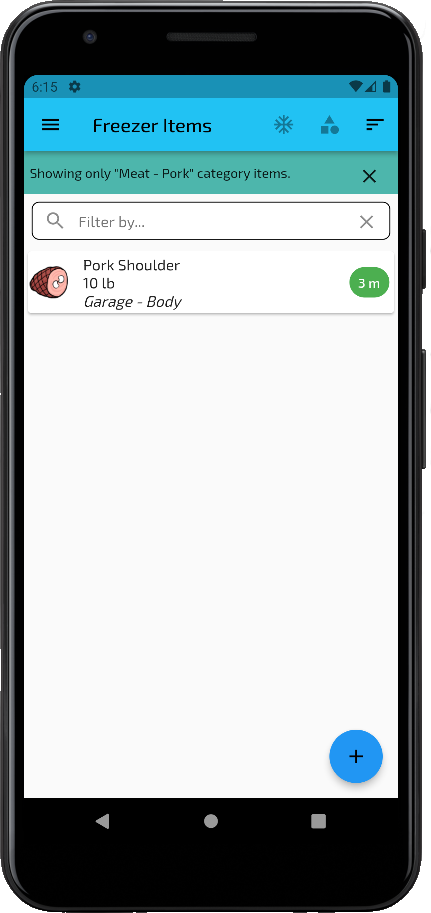
Filtering Items By Category
- In the app drawer, select the "Freezer Items" option to display the list of items in your freezers.
- Tap the category filter icon (stacked blocks) in the app header to open a list of available categories.
- Select the desired category from the list to show only the items in your list that are in the specified category (shown).
- You can clear the filter by tapping the "X" in the filter banner.
Note: You can use the text search and freezer filter while filtering by category.
Filtering Items By Text
- In the app drawer, select the "Freezer Items" option to display the list of items in your freezers.
- Enter your filtering text into the text filter bar.
- The list of freezer items will be filtered to only include items that have the text value in their description, quantity or shelf values (shown).
- You can clear the filter by tapping the "X" in the text filter bar.
Note: You can use the freezer filter and category filter while using the text filter.
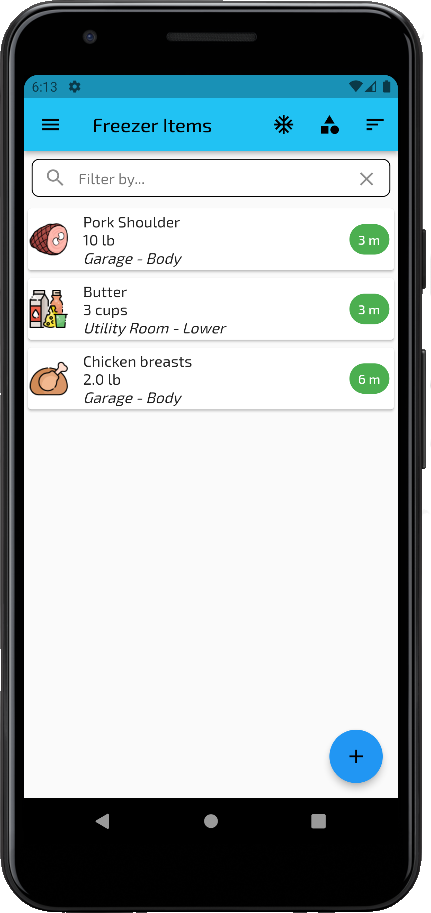
Sorting Freezer Items
- In the app drawer, select the "Freezer Items" option to display the list of items in your freezers.
- Tap the sorting icon (three bars) in the app header to open the sorting dialog.
- Select the field to be used for sorting and the desired direction and tap "Ok"
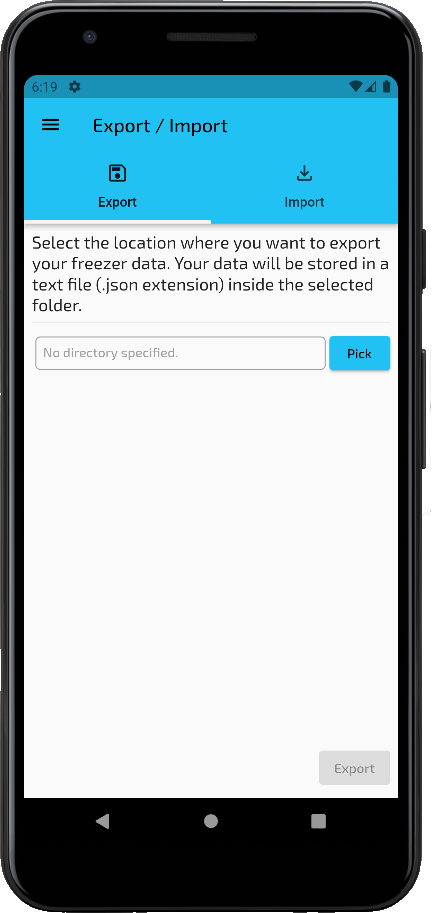
Exporting Data
- In the app drawer, select the "Export / Import" option to open the Export/Import screen.
- Select the "Export" tab (shown).
- Select a folder where the exported data will be saved (you may be asked for permission).
- Tap the "Export" button to generate the export data - when it is done a notification will pop up at the bottom of the screen.
Note: The data is stored as a text file in JSON format (a standard data transfer format).
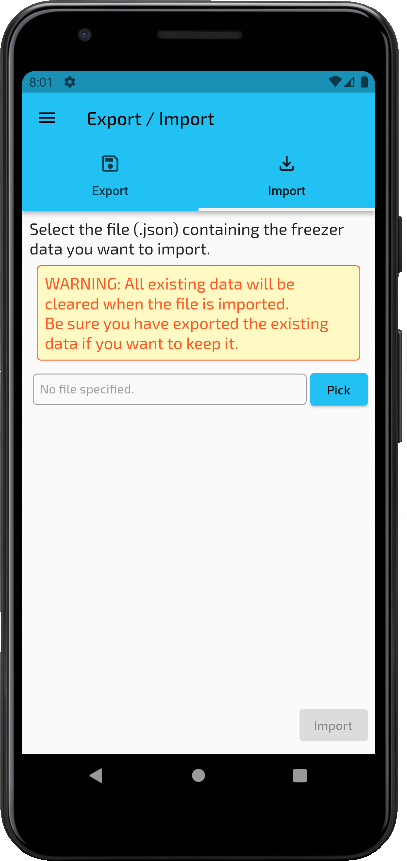
Importing Data
- In the app drawer, select the "Export / Import" option to open the Export/Import screen.
- Select the "Import" tab (shown).
- Select the file containing the exported data you want to import (you may be asked for permission).
- Tap the "Import" button to generate the export data - when it is done a notification will pop up at the bottom of the screen.
Warning: The existing data in the app will be cleared and overwritten by the imported data. You should be sure that your current data has been exported as a backup before importing new data.